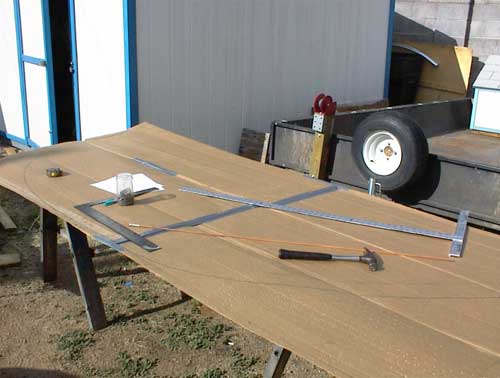
| I turned the existing walls into an expensive work bench by screwing them together and
to a pair of old saw horses. I'm so wishing the builder had
cut the walls too big instead of too small. |
 |
| The profile I've chosen is somewhere between the Kuffel Creek
Comet and the Trailer for Two(TFT) (here is the TFT profile compliments of angib). I had to strengthen the galley curve a bit to fit the profile onto my chassis
which the builder made only 108 inches long (instead of 115 inches called for in both sets of plans).
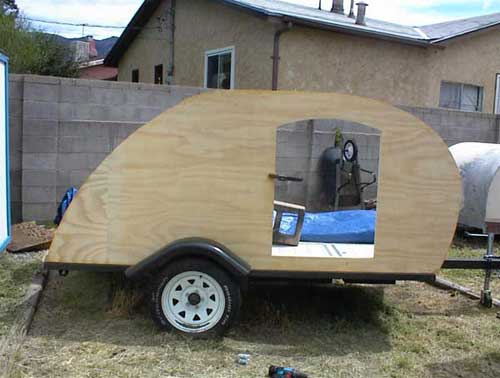
My tear will not be a true 5x10, it will be 56.5 inches wide by 113 inches long. I've laid out the profile on
some cardboard that I'll cut out and use as a template for the first wall. |
 |
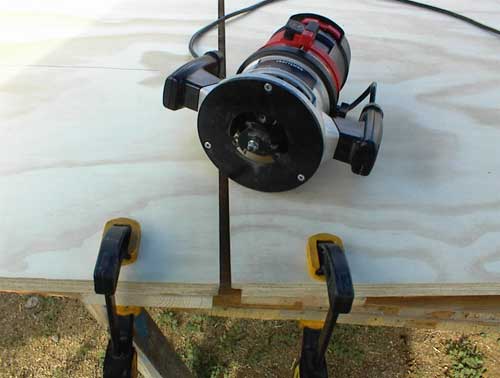
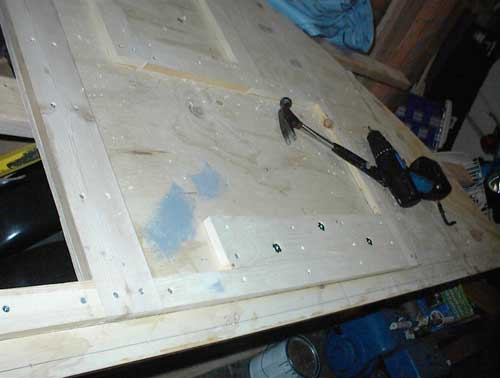
| I went with 1/2 inch plywood instead of 3/4, partly due to cost, partly to give me a bit more clearance
so the wheels have less chance of rubbing against the walls. I couldn't find any 10 foot plywood locally so had
to join pieces to get a large enough blank. Here you see the pieces ready to be slotted. The three blade cutter
made a nice slot in each piece which I filled with a spline cut from red oak. |
 |
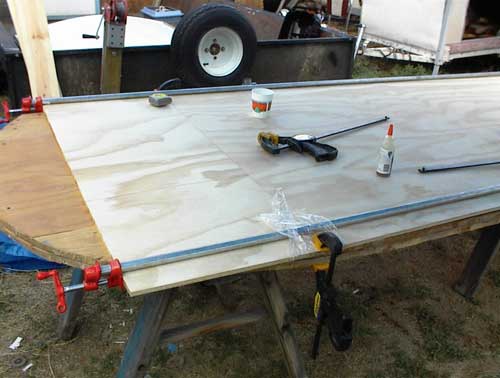
| Lots of Gorilla Glue (actually Elmer's brand) and some light clamping will hopefully make
for a strong joint. I'm glad I hadn't cut my two remaining 10 foot pipes so I could clamp across the
entire length. I need to get this joint pretty even as I'm likely only going to paint the tear, not cover
it with aluminum. The side blanks were glued on Labor Day weekend but I didn't cut them until after I finished
the floor nearly two weeks later. (9/4/2005) |
 |
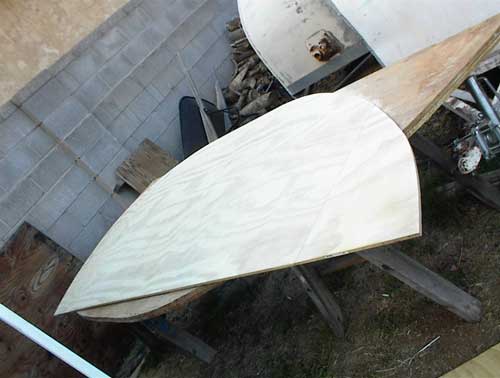
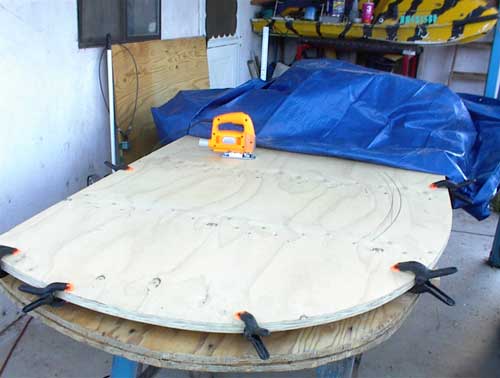
| I bought a cheap variable speed jigsaw (sabre saw) from Harbor Freight and used a metal
cutting blade to rough cut the sides. I had the saw set at nearly its slowest speed and pushed
very, very lightly so the blade made a square cut. Both side are now rough cut and clamped together
waiting for an edge sanding. The profile looks horrible here but it's just due to the angle I photographed it
from--I assure you, no wacky profiles here.(9/18/2005) |
 |
| After a few false starts I correctly laid out the door openings.(10/16/2005) |
 |
| The doors are cut; lots of sanding of the openings in my future.(10/16/2005) |
 |
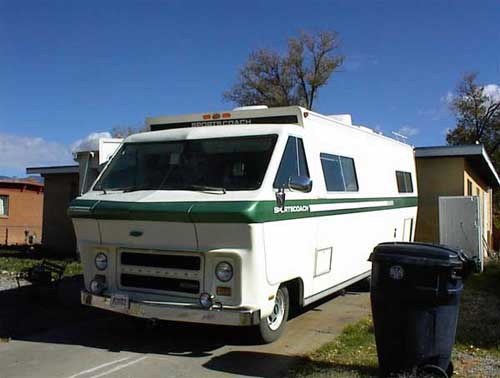
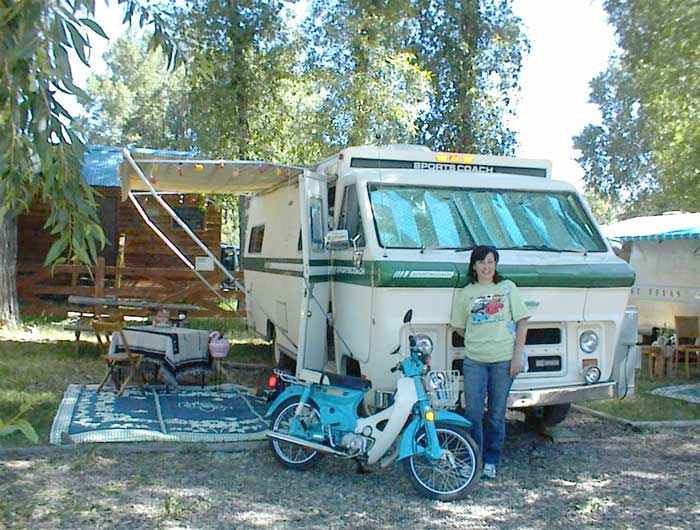
| Oops, I did it again. Purchased this 1972 Chevallero Sportscoach motorhome in November
to assure I would never finish the teardrop walls. Here is the Chevallero page.(11/19/2005) |
 |
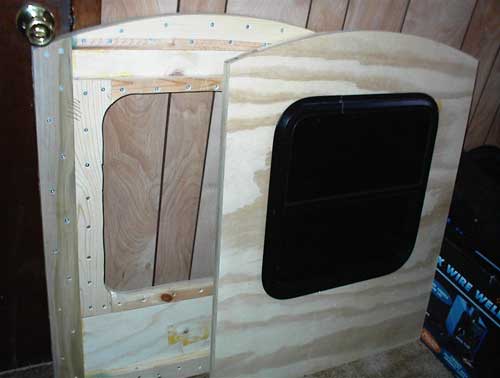
| Finally got back to the teardrop during the Christmas break. The doors were framed out using
standard one-by pine and completed on my kitchen table. The edge where the hinge will
go was framed with poplar to give it a bit more strength.(12/29/2005) |
 |
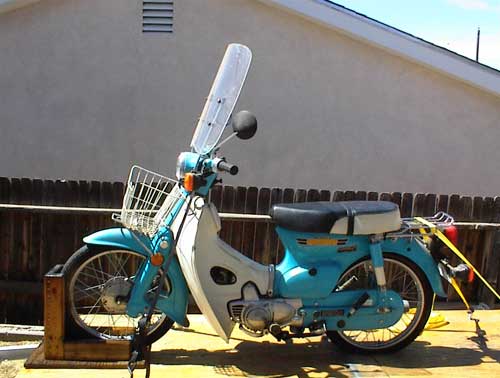
| Much of spring was spent getting the Chevallero motorhome in shape for camping. Since the
coach is so old I didn't think it would pull a car for my dinghy vehicle, I bought this scooter.
A 1981 Honda C70 Passport, I spent much time getting it up and running so I'd have something to run
to town on when camped at an RV park. Here is the C70 page. (04/01/2006) |
 |
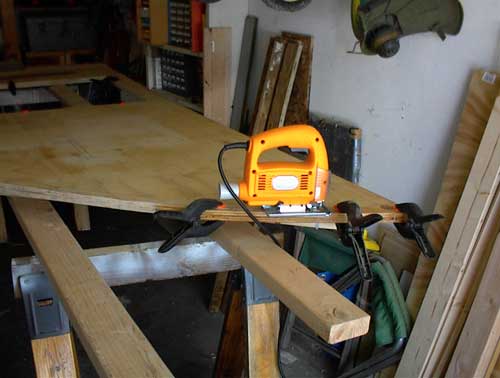
| After the first successful campout in the
motorhome, where I got all of 7.56 miles/gallon I decided it was probably time to get back
to work on the teardrop walls and I did so on the 4th of July break. Here I'm cutting a 3/8" notch where the galley hatch will go--leaves
room to add foam weatherstripping to make the hatch watertight. |
 |
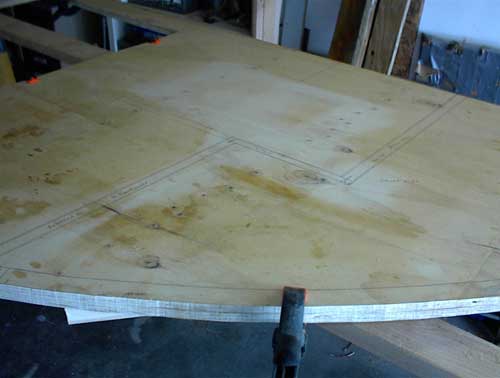
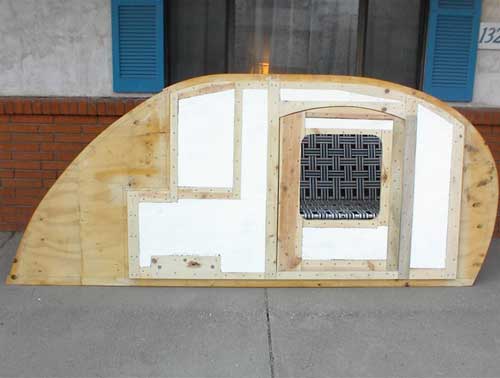
| I laid out the bulkhead and closet areas, as well as the location of each roof spar on both
inner walls. The layout was hampered by the fellow who originally built the teardrop making it too small.
I had to make concessions in both the front closet size and the depth of the galley since my chassis is too
short to make a true 5x10. The light area in front of the bulkhead is where I sanded out the air conditioner
door. Originally planning to have a fold-down door that a window air unit would slide out I realized that
I wouldn't ever be able to open the floor storage door in the corner of the living compartment. I'll likely go
with A/C mounted in a tongue box instead. |
 |
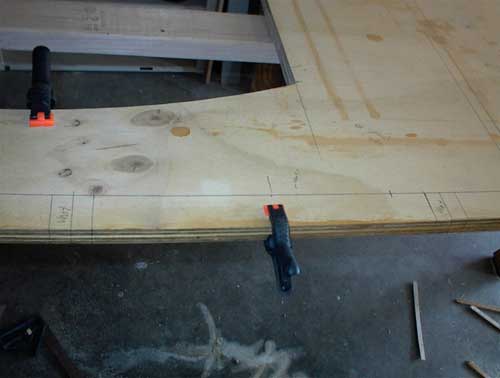
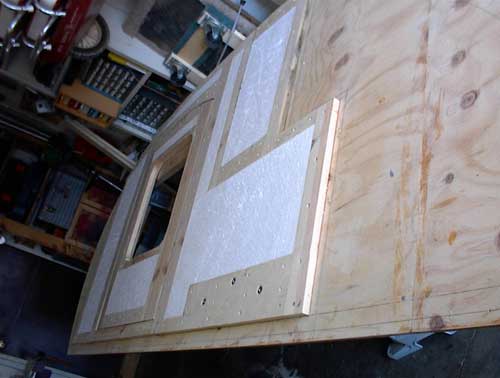
| I made sure to mark each spar location on both walls while they were clamped together. I did my best
to see where the interior roof sheathing pieces would end (4x8x.125 plywood) and place double spars in those
location and these ones where the roof vent/fan will go. (07/04/2006) |
 |
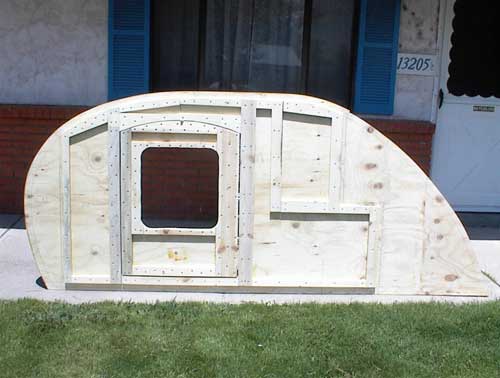
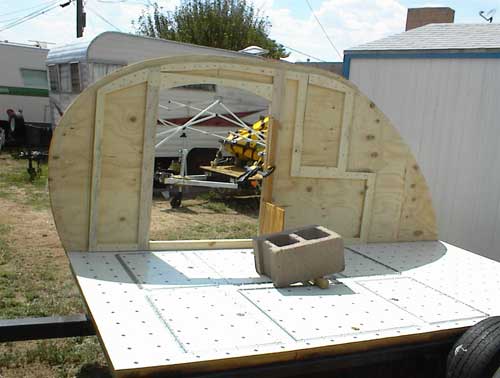
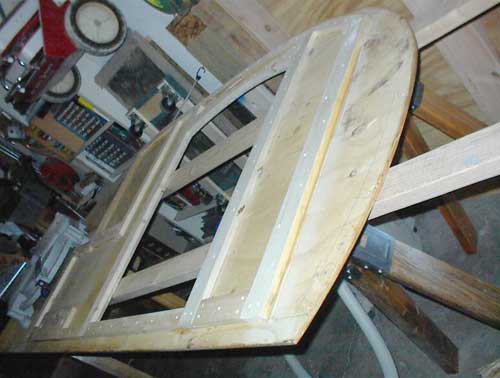
| Here is the curbside wall completely framed with one-by lumber. The framing on the front side
of the door is poplar, the rest is pine. Not much room for insulation but I will fill the available
gaps with 3/4" foam before skinning the inside. |
 |
| I uncovered the floor today and set the framed wall temporarily in place. I have two pairs of
potential fenders and need to see if I'll need to add backing to screw the ones I choose to the walls or
simply to the chassis. (07/21/2006) |
 |
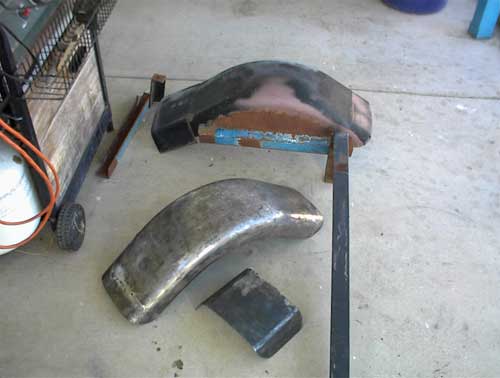
| Someone gave me these trailer fenders for free. They were welded to some angle steel
and used on a VW bug turned pickup I'm told. Lots of grinding to get the fenders free and loosen the
poorly done extensions. |
 |
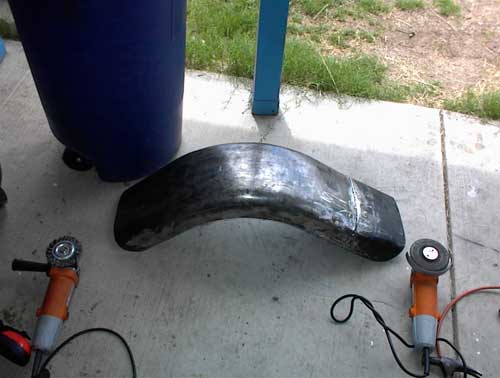
| I was able to weld the extensions back on and trim them to shape. |
 |
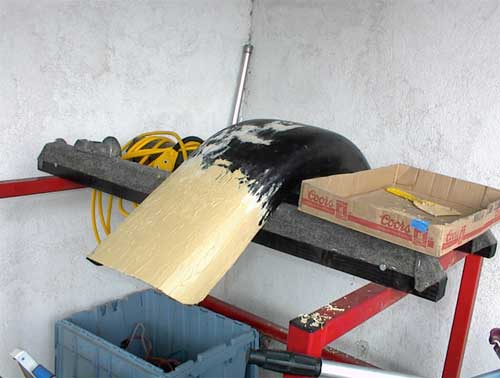
| It took one heck of a lot of bondo to get the fenders smooth. (7/23/2006) |
 |
| Here is one of the fenders finished and temporarily screwed to the wall to see where I'll need
backing and T-nuts. It took forever to finish these buggers. I'd love to get some bigger reproduction fiberglass
fenders but my budget won't presently allow it. (9/11/2006) |
 |
| It took a long time to get back to the teardrop--working on a motorcycle trailer for a while.
I finally added the blocking and t-nuts to the curbside wall to mount the fender. (12/24/2006) |
 |
| A new year's resolution to make progress on the teardrop (and the robot), along
with some gentle prodding from a website reader (thanks Susan!) got me going on the street-side wall of the tear.
It only took a few days to add all the framing to this side, including the blocking for its fender.
Time to start insulating! (2/4/2007) |
 |
| I bought what I though was 3/4" insulation but found that it was much closer to 1". Was able
to belt sand the foam down flush. |
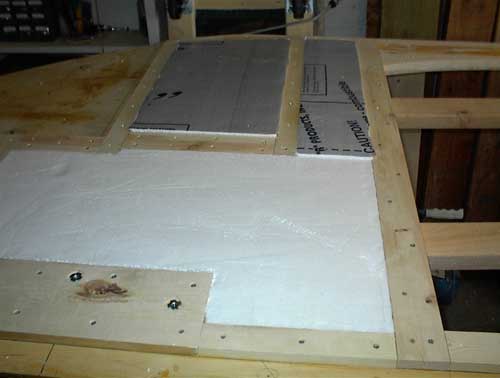 |
| The street side is now fully framed and insulated. |
 |
| I was also able to finish insulating the curb side wall. A major milestone! I plan to make some
brown paper rubbings of the framed/insulated sections before cutting and installing the 1/8"
interior sheathing. Should help me avoid hitting the hundreds of screw heads with the brads I'll use on
the skin. (2/11/2007) |
 |
| Here is one of the brown paper templates (though not a rubbing) that I made in November, 2008 (11/29/2008) |
 |